AWS Bedrock gives you access to foundation models from Anthropic, Meta, Mistral, and others through a single API. That's the pitch. The problem teams run into in production isn't model access — it's that costs become invisible fast. A dozen engineers experimenting with different models, a handful of internal tools calling Bedrock, and a few automated pipelines, and your monthly bill is five figures with no clear breakdown of who spent what.
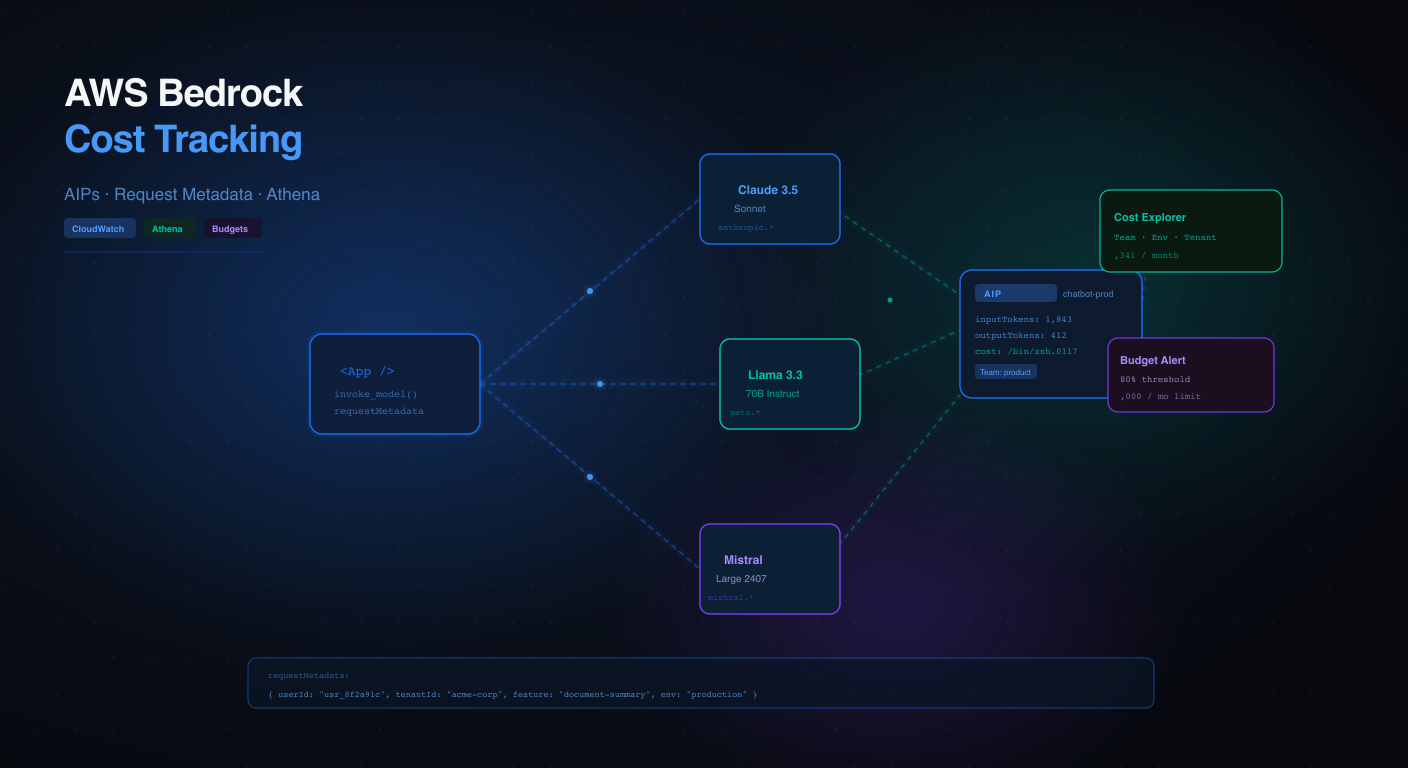
AWS built two mechanisms specifically for this: Application Inference Profiles (AIPs) and request-level metadata tagging. Together, they let you track costs by team, feature, environment, or any dimension that matters to your organization. This post covers how both work and the patterns we've used in production.
Why Bedrock cost tracking is harder than it looks
With most AWS services, cost allocation is straightforward: tag your resources, and AWS Cost Explorer shows you spend by tag. Bedrock complicates this because there are no persistent resources to tag. Every InvokeModel call is stateless — you call an API endpoint, get a response, and the request disappears. There's nothing to attach a tag to after the fact.
The naive approach — just look at the Bedrock line item in your AWS bill — tells you total spend but nothing about where it went. You know you spent $8,400 on Claude Sonnet in March. You don't know if that was the customer-facing chatbot, the internal document summarizer, the sales team's prospecting tool, or all three.
Application Inference Profiles solve this at the model-selection layer. Request metadata tagging solves it at the individual call layer. Most production setups need both.
Application Inference Profiles (AIPs)
An Application Inference Profile is a named alias for a foundation model that you create in your AWS account. Instead of calling anthropic.claude-3-5-sonnet-20241022-v2:0 directly, your application calls a profile ARN like arn:aws:bedrock:us-east-1:123456789012:application-inference-profile/customer-chatbot-prod. The model invocation is identical — Bedrock routes through the profile to the underlying model. What changes is the billing: every token consumed through that profile shows up under its own cost allocation tag in AWS Cost Explorer.
Creating a profile via the AWS CLI:
aws bedrock create-inference-profile \
  --inference-profile-name "customer-chatbot-prod" \
  --description "Production customer-facing chatbot" \
  --model-source '{"copyFrom": "anthropic.claude-3-5-sonnet-20241022-v2:0"}' \
  --tags '[
    {"key": "Team", "value": "product"},
    {"key": "Environment", "value": "production"},
    {"key": "CostCenter", "value": "CC-1042"}
  ]'
The tags on the profile flow through to AWS Cost Explorer automatically. Once you've activated the tag keys under Billing → Cost Allocation Tags, you can filter and group your Bedrock spend by Team, Environment, CostCenter, or any tag you've defined — without changing anything in the model itself.
Calling Bedrock through the profile is a one-line change from calling the model directly:
import boto3, json

bedrock = boto3.client("bedrock-runtime", region_name="us-east-1")

response = bedrock.invoke_model(
    # Use the profile ARN instead of the model ID
    modelId="arn:aws:bedrock:us-east-1:123456789012:application-inference-profile/customer-chatbot-prod",
    body=json.dumps({
        "anthropic_version": "bedrock-2023-05-31",
        "max_tokens": 1024,
        "messages": [{"role": "user", "content": prompt}]
    }),
    contentType="application/json",
    accept="application/json",
)
We typically create one profile per application per environment. A team running a production chatbot, a staging chatbot, and an internal summarizer gets three profiles: chatbot-prod, chatbot-staging, and summarizer-prod. The granularity cost is low (profiles are free), and the visibility gain is high.
Request metadata tagging
AIPs track costs at the application level. Request metadata tags let you go a level deeper — per request, per user, per feature, per workflow step. Every Bedrock API call accepts an optional requestMetadata map of key-value pairs that gets recorded in the model invocation logs.
response = bedrock.invoke_model(
    modelId="arn:aws:bedrock:us-east-1:123456789012:application-inference-profile/customer-chatbot-prod",
    body=json.dumps({...}),
    contentType="application/json",
    accept="application/json",
    # Per-request metadata — appears in CloudWatch / S3 invocation logs
    requestMetadata={
        "userId": "usr_8f2a91c",
        "sessionId": "sess_3d7e12",
        "feature": "document-summary",
        "workflowStep": "extraction",
        "tenantId": "acme-corp",
    }
)
This metadata doesn't affect model behavior or billing tags directly — it shows up in your invocation logs. To use it for cost analysis, you need model invocation logging enabled and a pipeline that joins the log data with your billing data.
Enabling model invocation logging
Invocation logging is off by default. Enable it in the Bedrock console under Settings → Model Invocation Logging, or via the API:
aws bedrock put-model-invocation-logging-configuration \
  --logging-config '{
    "cloudWatchConfig": {
      "logGroupName": "/aws/bedrock/invocations",
      "roleArn": "arn:aws:iam::123456789012:role/BedrockLoggingRole"
    },
    "s3Config": {
      "bucketName": "my-bedrock-logs",
      "keyPrefix": "invocation-logs/"
    },
    "textDataDeliveryEnabled": true,
    "imageDataDeliveryEnabled": false,
    "embeddingDataDeliveryEnabled": false
  }'
Each log entry includes the model ID, the request metadata you passed, input/output token counts, latency, and timestamps. A typical log record looks like:
{
  "schemaType": "ModelInvocationLog",
  "timestamp": "2026-04-18T14:23:11Z",
  "accountId": "123456789012",
  "region": "us-east-1",
  "requestId": "req_9f2b3c4d",
  "operation": "InvokeModel",
  "modelId": "arn:aws:bedrock:us-east-1:123456789012:application-inference-profile/customer-chatbot-prod",
  "requestMetadata": {
    "userId": "usr_8f2a91c",
    "tenantId": "acme-corp",
    "feature": "document-summary"
  },
  "input": { "inputTokenCount": 1843 },
  "output": { "outputTokenCount": 412 }
}
Turning logs into cost data with Athena
Logs in S3 plus Athena give you a queryable cost breakdown by any metadata dimension. The setup is a one-time crawl in AWS Glue, then SQL queries.
-- Cost by tenant using token counts + model pricing
-- Claude Sonnet 3.5: $3/M input tokens, $15/M output tokens (on-demand)
SELECT
  requestmetadata['tenantId']                              AS tenant,
  SUM(input.inputtokencount)                               AS total_input_tokens,
  SUM(output.outputtokencount)                             AS total_output_tokens,
  ROUND(
    SUM(input.inputtokencount)  / 1e6 * 3.00 +
    SUM(output.outputtokencount) / 1e6 * 15.00, 2
  )                                                        AS estimated_cost_usd
FROM bedrock_invocation_logs
WHERE modelid LIKE '%customer-chatbot-prod%'
  AND timestamp BETWEEN '2026-04-01' AND '2026-04-30'
GROUP BY 1
ORDER BY 4 DESC;
This query gives you a per-tenant cost breakdown for April — useful for SaaS products where you want to understand which customers are driving LLM spend, or for internal showback reports where each team sees what they consumed.
Cost visibility framework we use in production
| Layer | Mechanism | Granularity | Latency |
|---|---|---|---|
| Application | AIP cost allocation tags | Per app / environment / cost center | ~24h (billing pipeline) |
| Request | Invocation log + requestMetadata | Per user / tenant / feature / session | Near real-time (CloudWatch / S3) |
| Budget | AWS Budgets alerts on AIP tags | Per application threshold | Daily alert |
| Anomaly | AWS Cost Anomaly Detection on Bedrock | Service-level spike detection | ~24–48h |
Setting up budget guardrails
Profiles without budget alerts are half the solution. We create an AWS Budget scoped to each AIP tag combination so teams get notified before they blow past their allocation — not a month later when the bill arrives.
aws budgets create-budget \
  --account-id 123456789012 \
  --budget '{
    "BudgetName": "bedrock-chatbot-prod-monthly",
    "BudgetLimit": {"Amount": "2000", "Unit": "USD"},
    "TimeUnit": "MONTHLY",
    "BudgetType": "COST",
    "CostFilters": {
      "Service": ["Amazon Bedrock"],
      "TagKeyValue": ["user:Team$product", "user:Environment$production"]
    }
  }' \
  --notifications-with-subscribers '[{
    "Notification": {
      "NotificationType": "ACTUAL",
      "ComparisonOperator": "GREATER_THAN",
      "Threshold": 80
    },
    "Subscribers": [{
      "SubscriptionType": "EMAIL",
      "Address": "platform-eng@company.com"
    }]
  }]'
With this, the platform team gets an email when the production chatbot has consumed 80% of its monthly budget — enough lead time to investigate without waiting for a breach.
A wrapper that makes this transparent
Expecting every engineer to remember to pass requestMetadata on every call is a losing bet. We wrap the Bedrock client so metadata is injected from context automatically:
import boto3, json, os
from contextvars import ContextVar

_request_ctx: ContextVar[dict] = ContextVar("bedrock_ctx", default={})

class BedrockClient:
    def __init__(self, profile_arn: str):
        self._client = boto3.client("bedrock-runtime", region_name="us-east-1")
        self._profile_arn = profile_arn

    def invoke(self, messages: list, **kwargs) -> dict:
        ctx = _request_ctx.get()
        response = self._client.invoke_model(
            modelId=self._profile_arn,
            body=json.dumps({
                "anthropic_version": "bedrock-2023-05-31",
                "max_tokens": kwargs.get("max_tokens", 1024),
                "messages": messages,
            }),
            contentType="application/json",
            accept="application/json",
            requestMetadata={
                "env": os.getenv("APP_ENV", "unknown"),
                **ctx,   # userId, tenantId, feature — set per request
            },
        )
        return json.loads(response["body"].read())

# Usage: set context once at the request boundary (FastAPI middleware, etc.)
def set_bedrock_context(user_id: str, tenant_id: str, feature: str):
    _request_ctx.set({
        "userId": user_id,
        "tenantId": tenant_id,
        "feature": feature,
    })
Set the context in your API middleware at the start of each request, and every Bedrock call within that request automatically carries the right metadata — without touching the call sites.
What this unlocks
With AIPs and request metadata in place, you get a set of answers that were previously impossible to extract from a single Bedrock line item on your AWS bill.
Team-level showback. Which team consumed what this month, mapped back to their cost center. Enough to make AI spending a first-class budget line instead of a shared mystery.
Feature-level ROI. You shipped a new summarization feature. After a month, you can see exactly what it cost in tokens and compare it against the business metric it was supposed to move.
Per-tenant billing for SaaS. If you're a SaaS product passing LLM costs through to customers, tenant-tagged logs let you build accurate usage-based billing rather than averaging across your whole customer base.
Prompt cost regression testing. Every time you change a system prompt, you can measure whether input token counts went up or down across similar requests — before the change ships to production.
The practical starting point
If you're already using Bedrock and have no cost visibility: start with AIPs. Create one profile per application, activate the cost allocation tags, and within 24 hours you have a breakdown in Cost Explorer that didn't exist before. The request metadata and Athena pipeline can come later as your needs get more granular.
If you're starting a new Bedrock integration from scratch: build both in from day one. The wrapper pattern above takes an afternoon to set up and saves weeks of archaeology later when someone asks "wait, who is actually using this and what is it costing us."
AI infrastructure costs are no different from compute or storage costs — they're predictable and manageable when you instrument them. The tooling AWS has built makes it straightforward. The only real mistake is waiting until the bill is already surprising to start paying attention.